Import and Upload of files
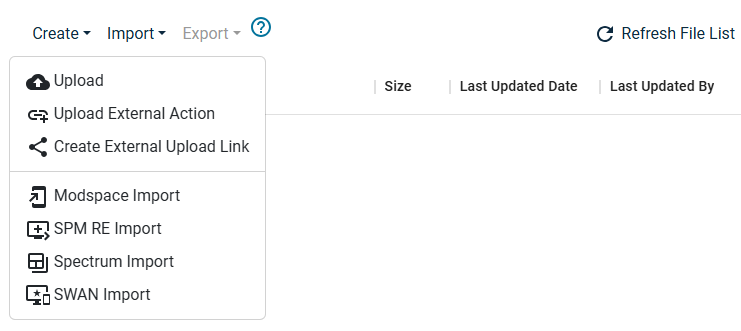
There are various ways to get data from other systems into PHIL. The options can be seen in the top bar of the file explorer. The following section gives in-depth explanations for the different upload options.
For file transfer from the interactive environment, see Data Transfer.
Upload
Upload is used to upload files from your local machine into PHIL. In the dialogue, you can click Choose files (or Dateien auswählen) to open an Open Files Dialog. Alternatively, you can drag & drop files from your local file explorer to the Files text field. You can complete your upload by optionally providing an upload description and select a Quality Control Status (see Quality Control Status). You can use the description, e.g., to add any details regarding the "Quality Controlled Status".
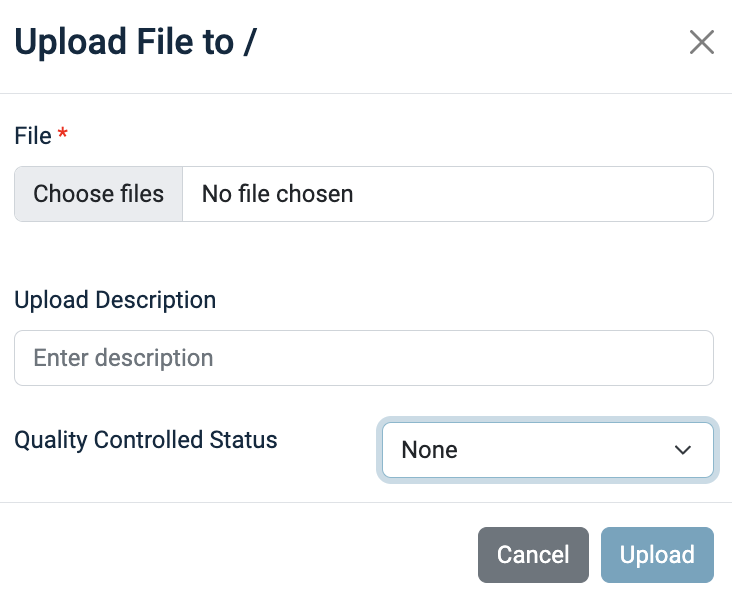
Note: you can only select files from one folder.
Upload External Action
If you - in particular as external partner - work outside of PHIL and have produced files by actions based on input files previously downloaded from PHIL, then you should use Upload External Action instead of simple Upload to preserve traceability.
By Upload External Action you upload not just files but their creating action with the relationship between input and output files. This has two main advantages:
a) the dependency of the uploaded result from the input is visible in PHIL (see File Properties, Creating Action and Traceability Report),
b) by this dependency the System Validity Computation computes the Validity of the output files based on the "Quality Controlled Status" of the uploaded action AND the File Validity of the inputs. So with the "Quality Control" you take over responsibility only for this particular workstep! (see Quality Control Status)
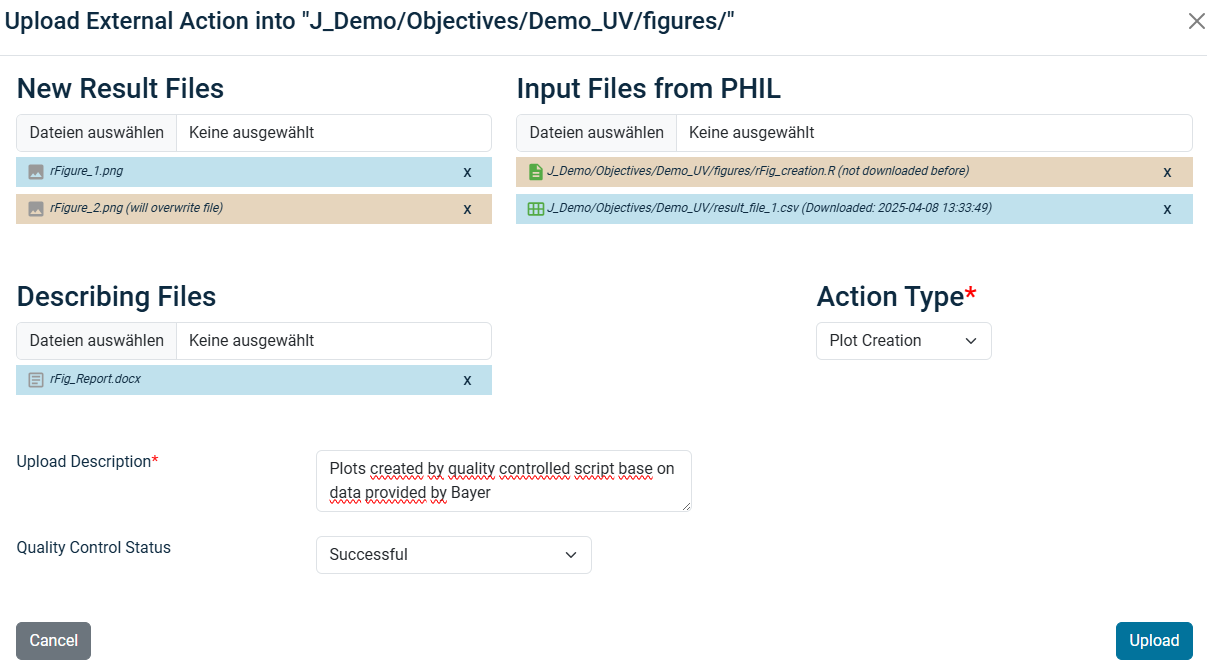
Note: In most cases in such an external action you use some script file(s) which you have developed yourself.
These files - currently - need to be uploaded by a "simple" Upload beforehand, so that you can reference these files as Inputs!
New Result Files: here you add files created on your computer to be uploaded as output files of that action like described before.
In case you override file versions in PHIL you see a warning.
Input Files from PHIL: here you select files from you computer, which have previously been downloaded from or uploaded to PHIL.
These files are not uploaded again, they are identified in PHIL based on their MD5 hash and just referenced. If you have not downloaded the file before - like a previously uploaded script file, you see a warning.
If a locally selected file is not present in PHIL, you get an error message and cannot proceed.
Describing Files: sometimes you have files, you want to upload although those files are not meant to be results for further processing like log files or documentation of your work. These files you should add here.
Action Type: You must select an action type, which later helps to keep overview about the workflows. The most frequently used Action Types are explicitly available, otherwise you use "Other Action".
You should set the Quality Control Status according to the Quality Control you have performed on this work step (see Quality Control Status).
Upload Description: You should enter an upload description, in particular when using "Quality Control Status" as successful.
Create External Upload Link
You can even provide one-time-upload access to people who have no regular access to PHIL:
- Browse to the folder in which the files should be uploaded
- Select the menu item
Create External Upload LinkunderImport - Specify the recipient and add a message if required and send the link
Note: The external upload link has an expiration date of 10 days and can only be used once!
Then the recipient gets a link by email which redirects him to the PHIL Upload Utility, where he can select files from his local computer for upload.
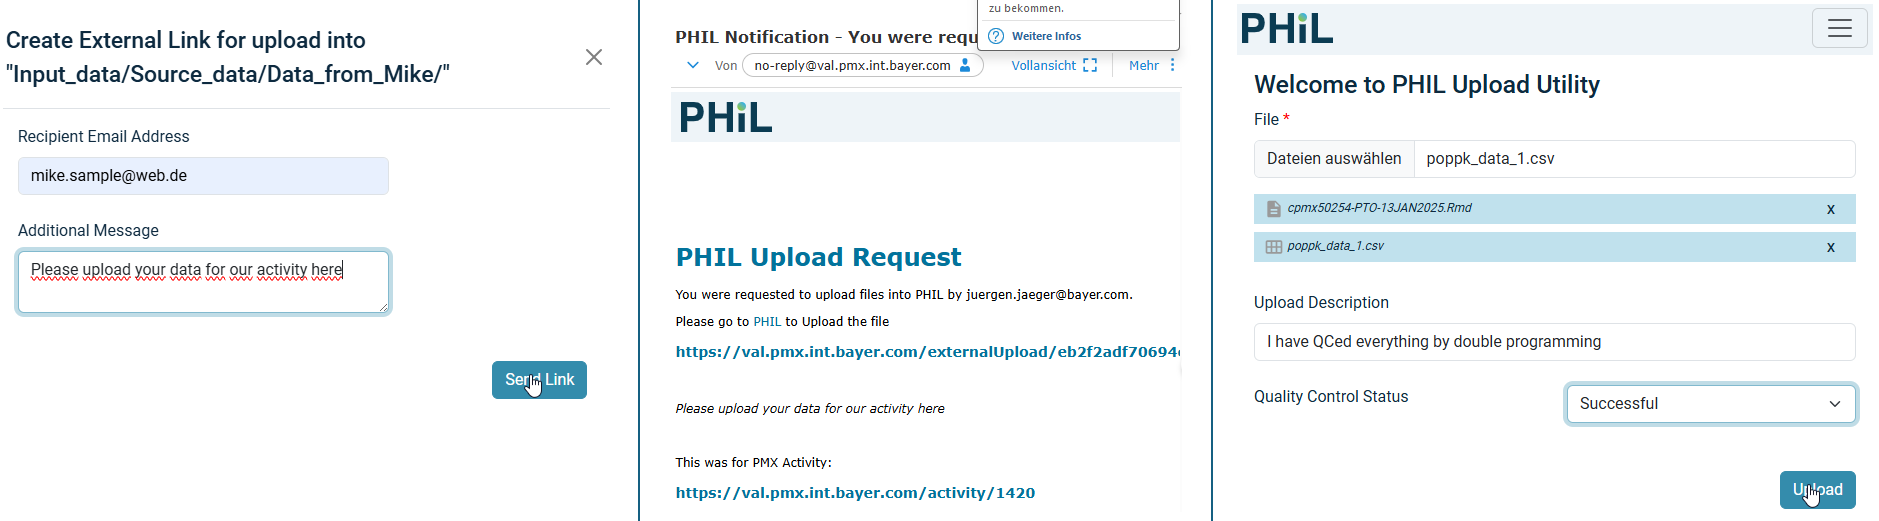
Afterwards the files appear in PHIL created by the recipient.

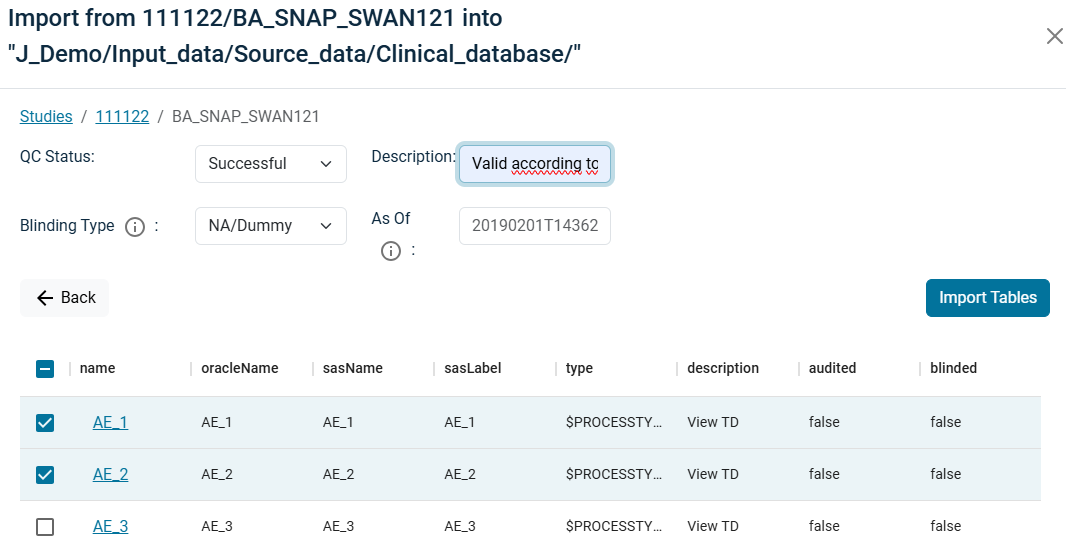
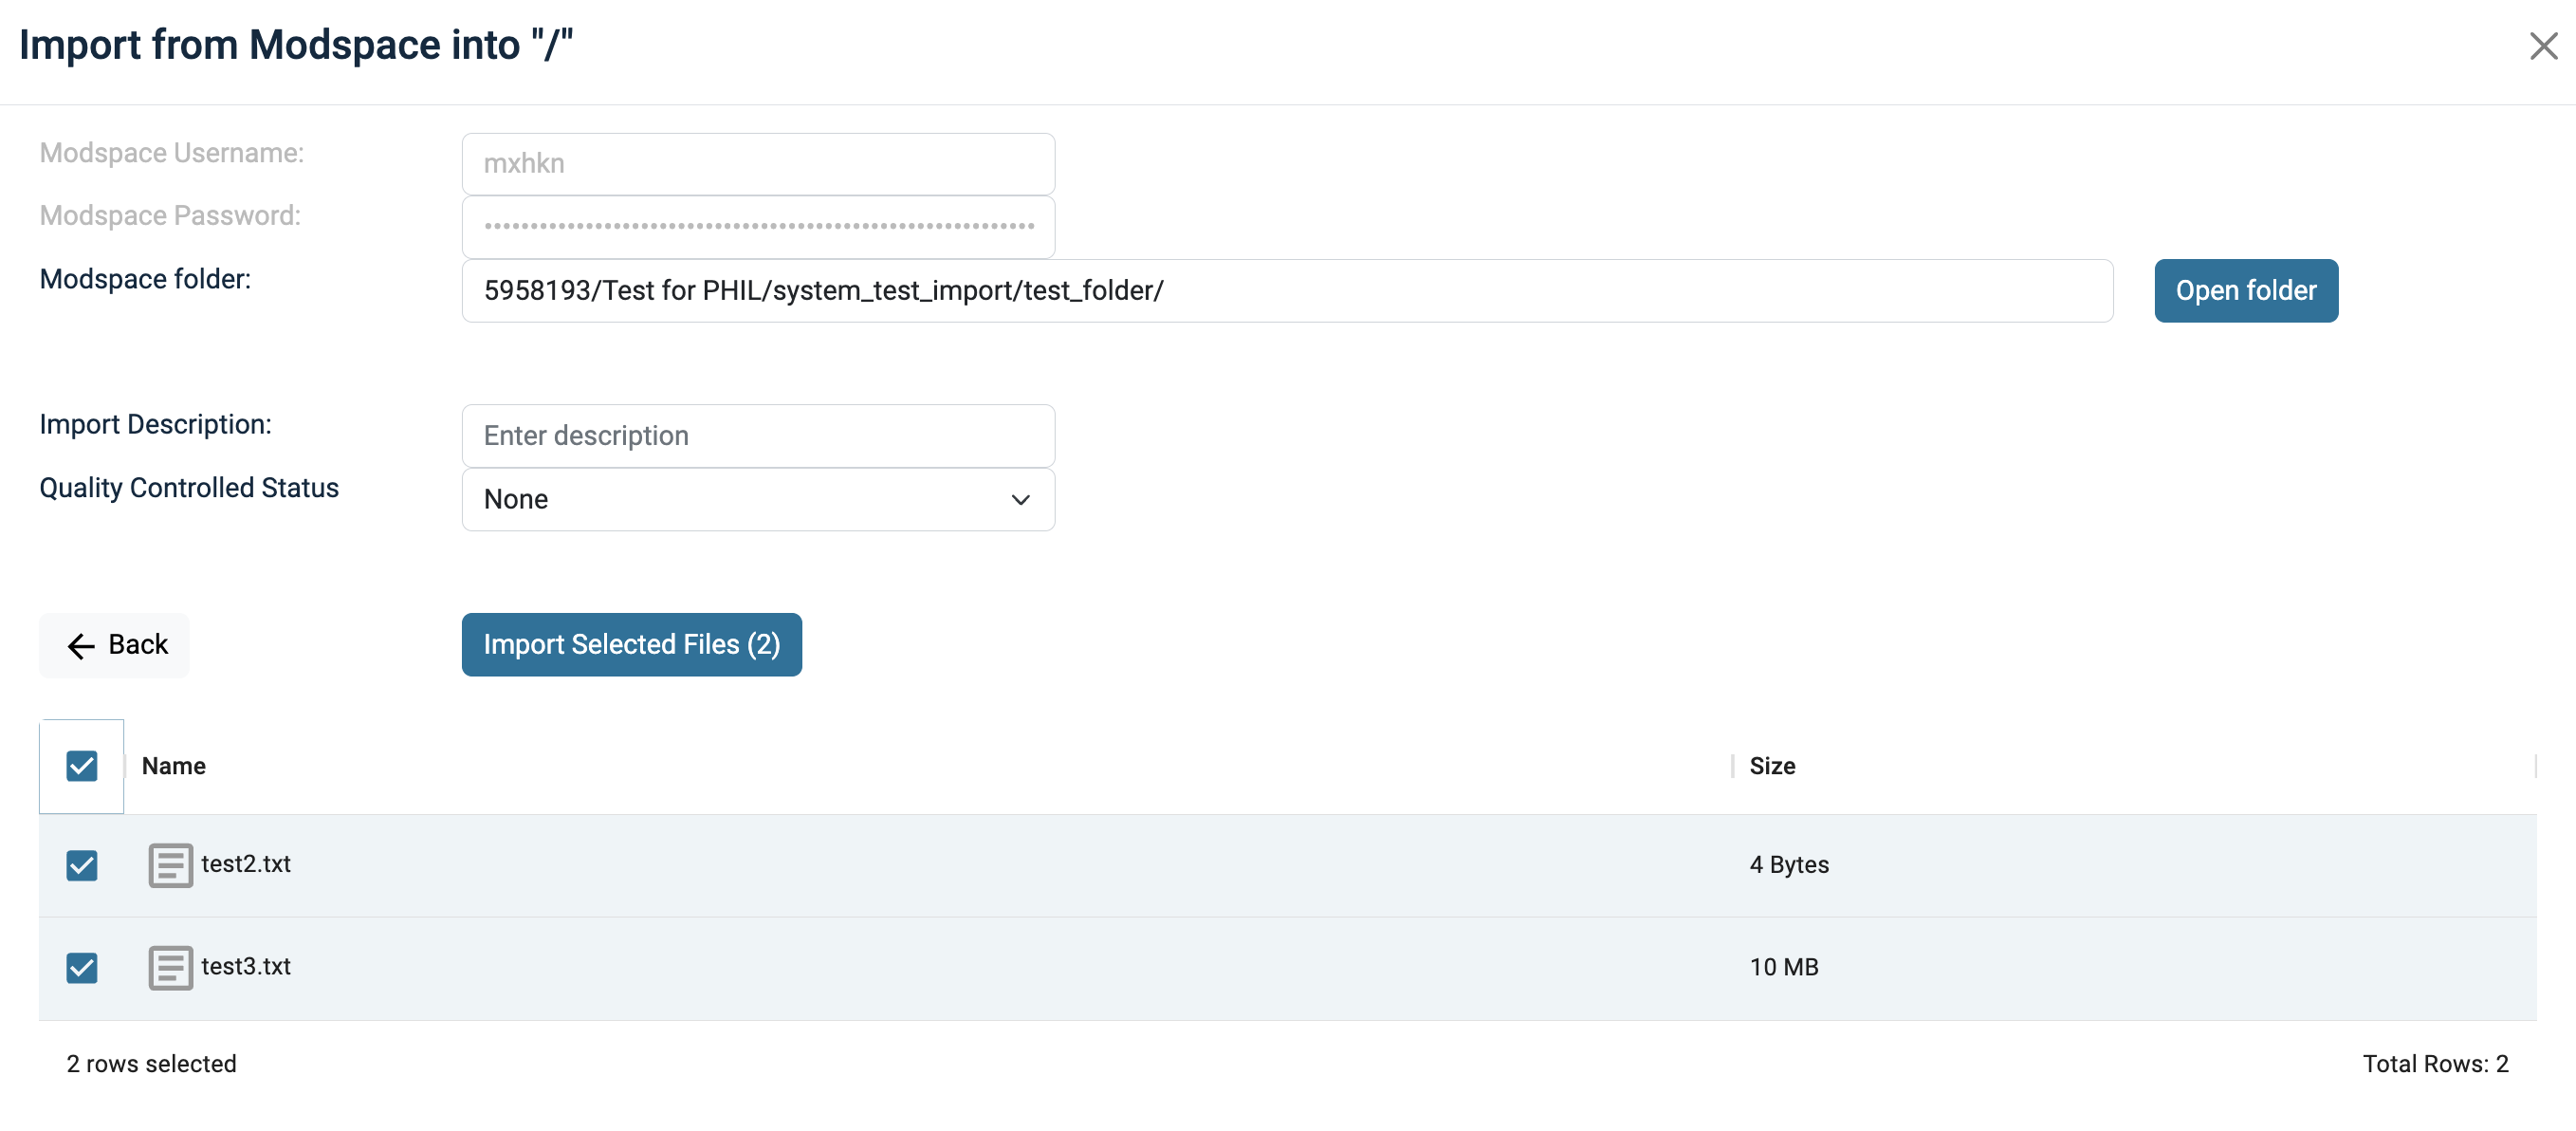
SWAN, ModSpace, SPM SVN Import
In the file explorer, you have the option to import files from SWAN, ModSpace or SPM SVN by clicking on the respective buttons on the top. With every import you must specify whether the files are Quality Controlled or not.
Note: In contrast to import from SWAN, import from ModSpace can overwrite files.
 {class="imgframe" width="8
0%" }
{class="imgframe" width="8
0%" }
Spectrum Import
To import data from Spectrum in the file explorer, you need to click on Import and select Spectrum Import.
Here, you need to log in with your Spectrum credentials.
Note, that you need an active access to Spectrum. For this you need to update the Password from time to time (you get email notifications about expiration).
But here you must enter not your current, but the original Spectrum Password you got!
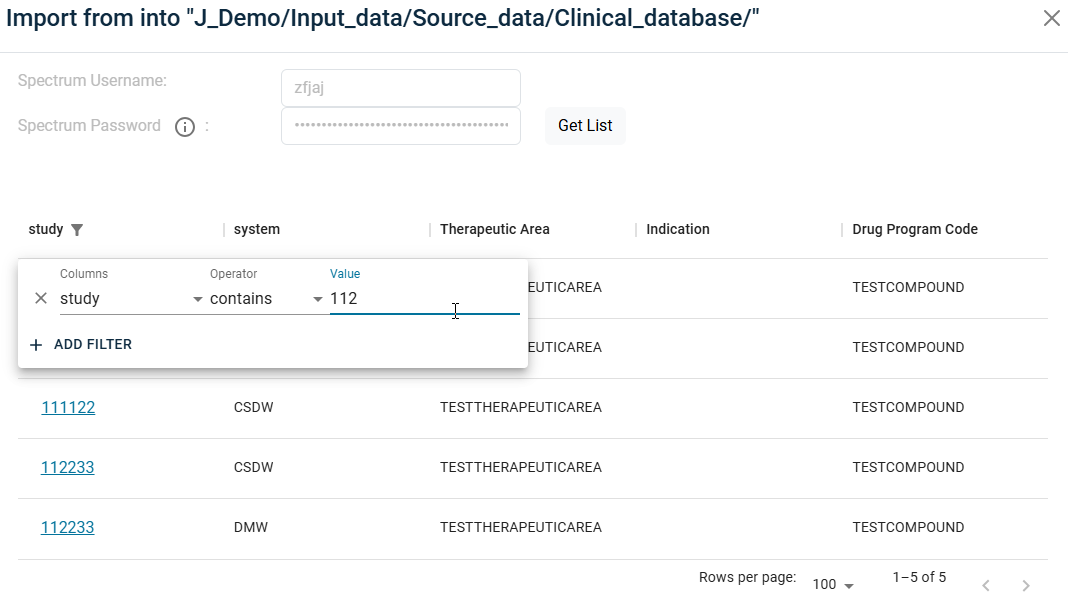
Once you are connected, you can select the data you want to import. First you select certain study,system and therapeutic area and in a second dialog the schema/business area and finally the tables.
Finally select the approriate "Quality Control Status" and potentially, if blinded/masked data should be shown.
Click on Import to finalize the import action.